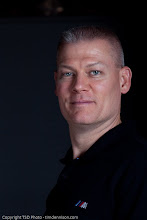
Post-Processing. There are entire books written on this subject. How do you narrow down this plethora of information to manageable chunks? Well, I'll start by asking; do you like it RAW? I sure do. Get your mind out of the gutter...I'm talking about your file format! If you are serious about your photography, you better be recording in RAW format. Leave jpeg to snapshots and family photos. Set your file format to RAW, and you will have as much control as possible when manipulating your images. What? You're not manipulating your images? This is worse than I thought.
The best way to approach this topic is to explain my workflow, and go through it step by step. Of course, you need to establish a workflow that works best for you.
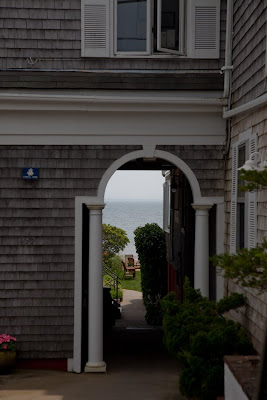
I will use a single photo, and show the transformation of the photo from capture to finished product. Let's start with the photo directly from the camera:

This photo is the basis for the workflow demonstration. As you can see, the shot is slightly crooked, which by the way is a huge pet peeve of mine. Nothing bothers me more than when I see a seascape that is slanted. It looks like all the water should be running off the edge of the page. I've seen professional photographers selling crooked photos! Do these people not look a their own work! Whoa! Sorry about that, I got a little carried away.
Being underexposed, there is very little detail in the shadows. The good news is, the background is not blown out (overexposed). I'd also like to tighten the crop up some. Finally, the photo is a bit cool, and I'd like to warm it up.
Before I start, I have to say that I am making these edits on a laptop with a screen that is not calibrated. I would ususlly be doing this on my home computer which I keep calibrated. Since I'm away from my office, I'm hoping you are getting some semblance of a proper exposure.
OK, first thing I do, after sorting through hundreds of photos, is to pick a few that might end up interesting. Sometimes, you'll find a diamond in the rough. A shot that as-is may not be all that spectacular, but after some finessing, you can end up with a very nice photo.
Since I use Adobe's Photoshop Lightroom, which I highly reccommend by the way, I'll be referencing the commands available to me with this software. In many casses, similar commands will be available to you depending on the software you are using.
To see what kind of details and exposures I'm working with, I will sometimes start with lighting. That way, if a photo is too far gone, I'll drop it right away. In many cases, I'll crop first if the lighting is a no-brainer. In this case, the lighting is suspect, so I'll go there first.
Since I'd like to bring back the detail and color in the water, I'll start by sliding the "Recovery" slider to the right. This lowers the exposure of the highlights. You can see it brought back some of the detail, but not as much as I'd like.
In this case, I'll drop the exposure of the entire shot enough to bring the water to where I want it.
 You can see that the entire photo is now well underexposed, but the central area is where I want it. What I'll do now is enhance the shadows using the "Fill Light" Slider. Remember, since we are shooting in RAW format, all the information in each pixel is there, we are just bringing out the best in each one.
OK, now this is starting to look really funky. By now you are asking, "Does this guy really know what the heck he is doing?" Now that you mention it, I guess I never really did say I knew what I was doing. This photo is now very washed out, and beginning to take on an HDR look. For those of you who don't know what HDR is, here is a search on
flickr.
Finally, I will add in some of the Blacks using the "Blacks" slider.
This is still showing up on my screen as pretty dark, so i'll mess around with the sliders a little more to get it where I like it. You won't usually get a photo with this much contrast to come out the way you want without some trial and error. In fact, that is what makes Photoshop Lightroom ideal for photographers. All the edits you do to your photos never change the original file. At any time, you can go right back to the original and start again. It's called non-destructive editing, and as far as I'm concerned ints one of the best things that's ever happened to digital photography. Again, I digress.
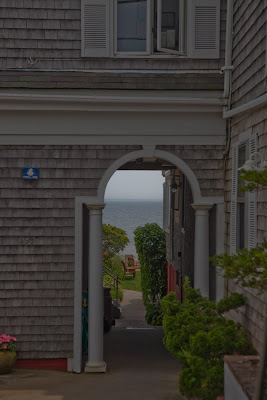
Here is the same photo in a form that I am happy with at this point. As you can see, I had to sacrifice some detail and color in the water since there is only so much you can do with the lighting that you have. Don't fret though, I'll show you what other options we have to address this issue.
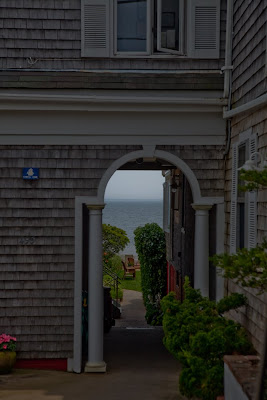
There is quite a bit more to do to this photo, so I'll save that for later.
 Look left, look right, look up, look down. There you go, another secret revealed! There are so many great shots, especially when walking in an urban area, if you keep your eyes away from front. A little disclaimer here...you do need to watch where you walk. You don't want to bend those glasses, break a nose or crack that fast L series lens you just spent $1250 for.
 I saw this while walking along the street, and there was no way to frame it from the street. This one was too good to pass up, so I walked down a driveway that was meant for off-street parking for an apartment. Not much risk there. If it were a single family home, and a private driveway, I probably wouldn't have done it. My rule of thumb is, if it were my property, would I be totally torqued to find somebody there?
 One of the guys was so into the job he was doing, he showed me around the building. I asked permission to take photos and he obliged. He left me to wander and of course I had to check out every inch.
 These are three shots I would not have been able to get without getting inside. This is not the first time this has happened to me. I've also been inside an old mill because I was at the right place at the right time.


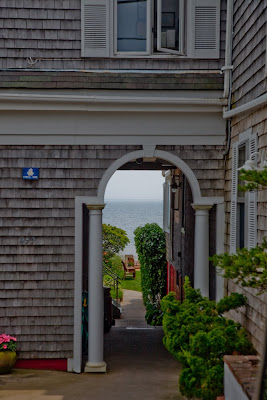
 Now that the exposure is close to what I would want, It's time to crop. Remember the Crop Post? I'd like to focus in on the opening that looks through to the Bay. I also like the blue plaque on the wall, so I want to keep that in the shot. Another component of a crop, is to always anchor the subject. That is if you are showing the entire subject. If you are shooting a detail, this "rule" does not apply. In this case, the bottom of the photo must show the anchor point of the building and columns. Can't have the building floating in mid air. My crop choice is shown here.


 Post-Processing. There are entire books written on this subject. How do you narrow down this plethora of information to manageable chunks? Well, I'll start by asking; do you like it RAW? I sure do. Get your mind out of the gutter...I'm talking about your file format! If you are serious about your photography, you better be recording in RAW format. Leave jpeg to snapshots and family photos. Set your file format to RAW, and you will have as much control as possible when manipulating your images. What? You're not manipulating your images? This is worse than I thought.